The falling leaf builds on the side slip. The board still stays across the slope on the same edge, but now you also travel left and right — like a leaf drifting down from a tree. It teaches you how to steer by shifting weight between your feet, which is exactly the movement you'll use to start your first real turns.
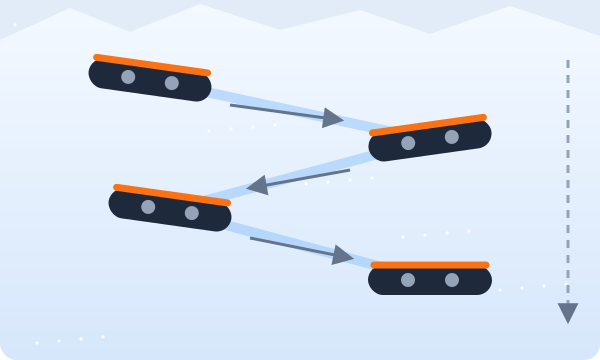
How it works
- Shift weight onto your front foot: the board travels toward the front (nose)
- Shift weight onto your back foot: the board travels the other way (tail first)
- The uphill edge stays engaged the whole time — you never cross the fall line
Think of the board as a seesaw. The foot with more weight sinks slightly and leads the way. A small shift is enough to start moving; a bigger shift moves you faster and points the board more downhill. Because you always stay on the same edge, you can stop at any moment by centering your weight and raising the uphill edge.
Step by step
- Start in a heel-side side slip
- Look left, press a little on your left foot — glide left across the slope
- Before you reach the edge of the run, center your weight and slow down
- Look right, press on your right foot — glide back the other way
- Repeat down the run, then practice the same on your toe edge
Riding “switch” for the first time
When you travel toward your back foot, your tail leads — this is called riding switch. It feels strange at first, but the falling leaf is a gentle way to get used to it. Turn your head to look in the direction of travel and keep the movement small. Being comfortable in both directions makes linked turns much easier later.
Toe-side falling leaf
Facing uphill, the same idea applies but your view is reversed. Look over your shoulder in the direction you want to go, shift weight to that foot, and keep pressing your toes and knees into the slope. Go slowly; most people need a few more runs on the toe side before it feels as natural as the heel side.
Common mistakes
- Shifting too much weight too fast: the board points downhill and speeds up — use small, gradual shifts
- Forgetting to look: your head and eyes lead the direction
- Flattening the board while traveling: keep the uphill edge raised
Drills that help
- Gates: traverse between two markers placed across the slope, stopping before each one
- Wider and narrower: make long traverses, then short ones, to practice control
- Count the drifts: aim for an even number of drifts in each direction on one run
- Point and go: point your front hand where you want to go and let your weight follow
When you're ready for the next step
You're ready to start changing edges when you can do a smooth falling leaf on both the heel and toe edge, control your speed while traveling, and stop whenever you want. If the board keeps turning downhill unintentionally, spend a little more time here — it pays off in the next lesson.